Documentation is scarce when it comes to introducing multiple Horizon instances, and having recently spun up a worker server for one of my projects, I wanted to document this for other developers that may need it.
This tutorial is using Ploi for server management, however I imagine the process is similar on Laravel Forge and aspects of the post should hopefully apply there too.
Your horizon.php config will be different depending on how you’ve configured it, but it should be similar enough for you to follow along.
Prerequisites
You’ll need to have Laravel Horizon installed in your app, and your horizon.php should be configurable with .ENV values, such as:
 'environments' => [
        'production' => [
            'image-processing' => [
                'connection' => 'redis',
                'queue' => ['imgproc'],
                'balance' => 'simple',
                'processes' => env('HORIZON_PROCESSES_IMGPROC', 3),
                'tries' => 2,
                'timeout' => 400,
                'memory' => 128,
                'nice' => 0,
                'backoff' => [60, 300, 900],
                'maxJobs' => 500,
                'maxTime' => 3600,
            ],
           ],
Above is an example of a part of horizon.php config. Take note of the ‘processes’ key. You may have a worker that doesn’t need to run a particular queue, and configurability is important as it allows flexibility.
Getting started with Ploi
Installing the codebase
Now you’ve got your Horizon config sorted, it’s time to head to https://ploi.io and create a new ‘worker server’ type. The worker server is specifically setup to run a copy of your codebase and process jobs through it. It doesn’t have any of the ‘fluff’ such as a database installed or a web server.
The worker server will take 10~ or so minutes to be created, and ideally you should create it where your primary server is located in order to use a private network.
Once Ploi has finished building your worker server, you’ll need to create a new application inside the worker. An application in a Ploi worker server will host your application’s codebase.
I typically name my workers after the project, but you can choose any name you like. You’ll then be prompted to attach a Git repository.
Make sure to tick the ‘Install composer dependencies’ option when installing your repository from Git.
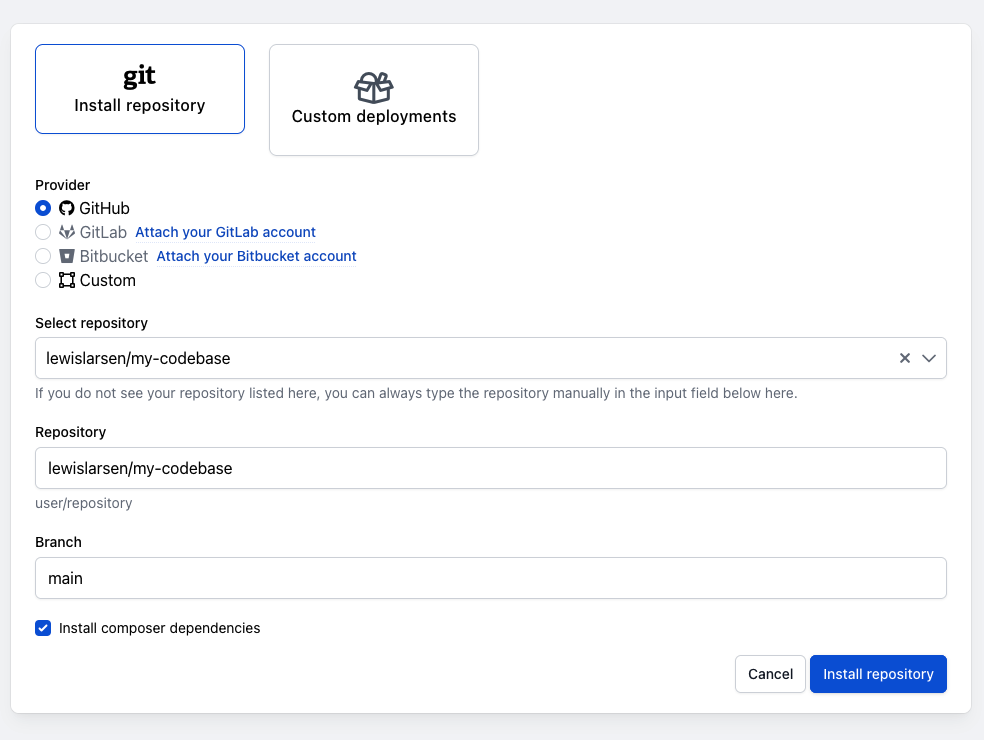
Once finished, you will be presented with a view like this, and then it’s time to continue.
Allowing access to your DB & Redis instances
Your worker will need to connect to your database, whether that’s Postgres, MySQL etc and your Redis, Valkey etc installations to process jobs on your primary server’s behalf.
I highly recommend creating an internal private network through your server provider and link all your servers together that way, it’s safer and more convenient should you need to add more workers down the road. This is dependent on the server provider you choose, but there is often ample documentation available.
On your server where your DB & Redis instances reside, click the ‘Firewall Rules’ section and create a new Firewall Rule. We’re going to allow access for the worker server to connect.
The IP address range will (likely) be different for you. This is the IP address range I use for my internal network.
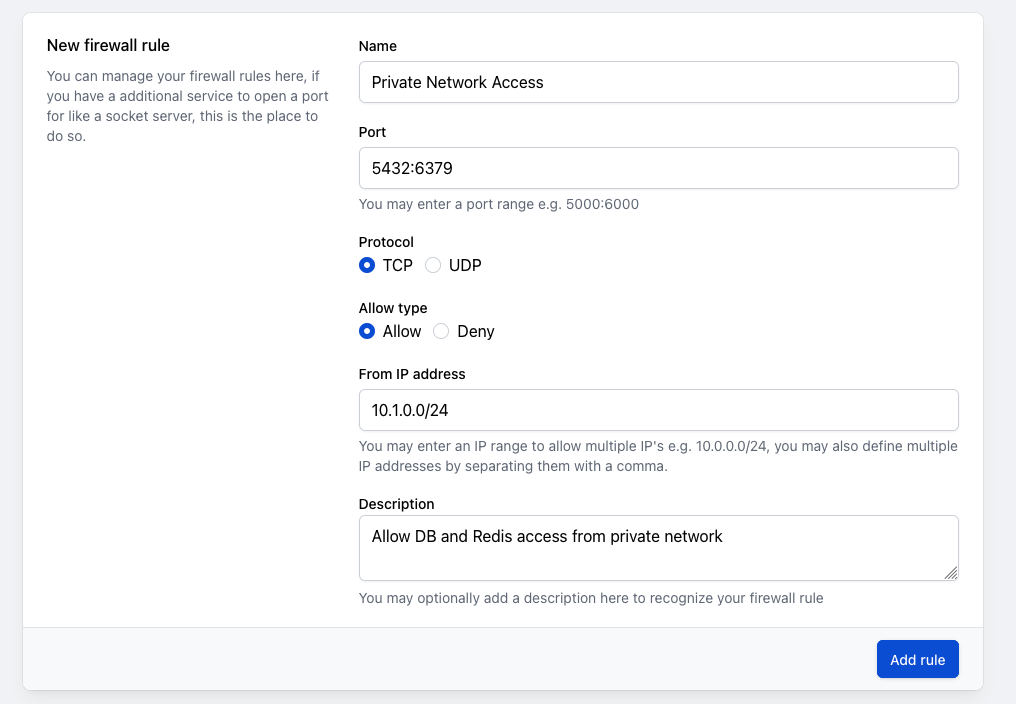
I am using Postgres and Redis. My port range is 5432 to 6379 respectively, which opens up those two ports and everything in-between to the internal network. Once you’re happy, create your new firewall rule, and we’ll start setting up the daemon on the worker.
Configuring your Horizon Daemon
Horizon requires a daemon to keep the process alive on your worker server. You will need to configure this as follows.
Head to the ‘Daemons’ page of your worker, and create a new daemon for your Horizon process.
Your path will look something like this:
php /home/ploi/applications/my_app/artisan horizonMake sure to replace the my_app section with the name of your application on your worker. This should be lowercase, if you’re not sure what the path should be, check the cd part of the deployment script that Ploi creates automatically.

Ploi will create the daemon, and you’ll see it appear below the form on the page. Tip: If you click the three dots you can view logs!
Configuring your .ENV
The most straightforward approach is to copy your .ENV from your Laravel application and tweak the values for the worker. Your worker doesn’t have a web server so nobody will be able to connect to it via browser.
At this point, you will need to update your DB_HOST and REDIS_HOST to the private internal IP address of the server that contains your database and Redis.
HORIZON_PROCESSES_IMGPROC which we defined in horizon.php can be set here. This will change based on your variable name is and what your config looks like, so keep that in mind! This is purely just an example.
Note: Please make sure the APP_NAME is the same as your Laravel application, and that your APP_ENV is set to production.
If your application name isn’t the same, your worker won’t pick up jobs in the queue, and if your environment isn’t set to production you may have an unintended configuration such as fewer processes assigned.
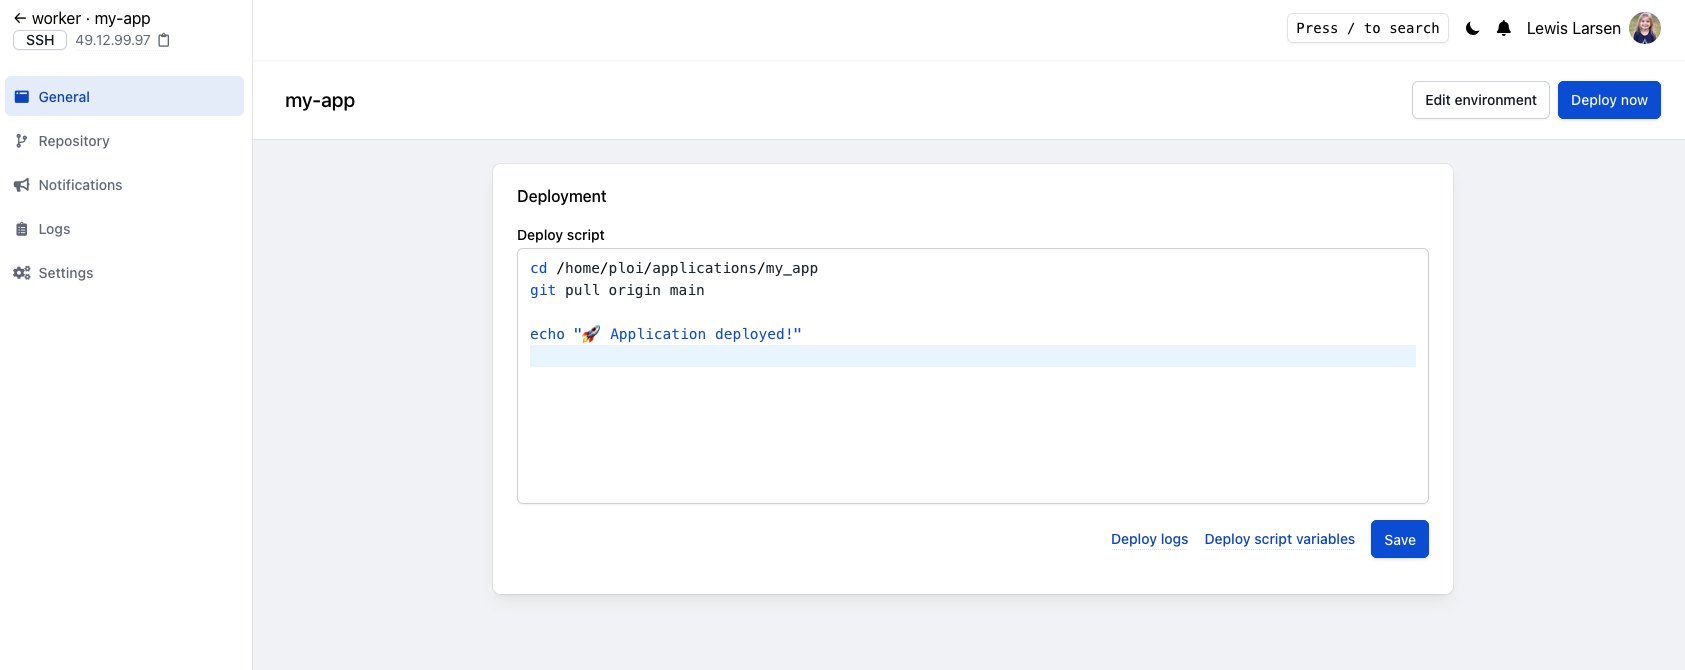
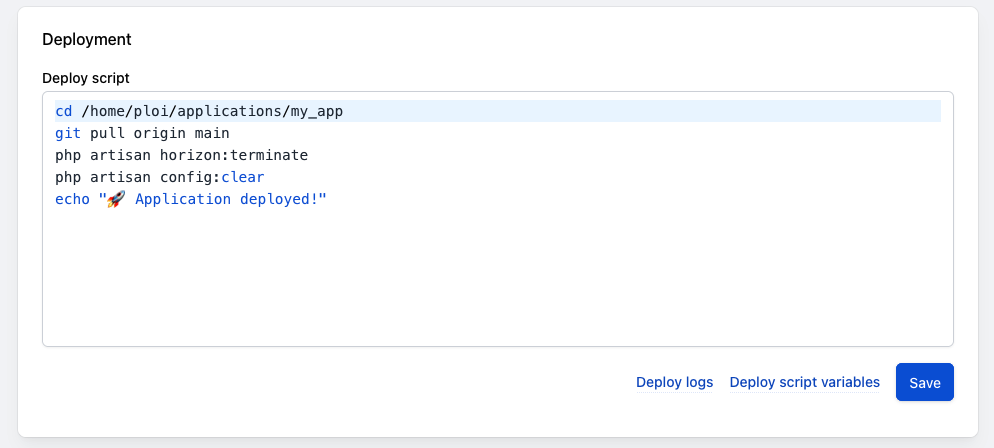
Configuring your Ploi Deployment Script
Your deployment script should include php artisan horizon:terminate as it’ll be restarted by supervisor automatically. This is necessary for the jobs to receive the latest code changes.
When deploying a new version of your application’s codebase, make sure to hit ‘Deploy’ on the worker’s codebases too. Unfortunately, there doesn’t seem to be a ‘Quick Deploy’ option for application types on Ploi so this can’t be done automagically when new code is pushed to the primary branch. :(
I added php artisan config:clear to my deployment script as well, but this is optional.
Finishing Up
If you have reached this part of the post, your worker should now be running and if you check your Horizon dashboard, you should see the worker.

You can check to see if your worker is picking up jobs by checking Horizon, or by visiting the ‘Daemons’ section on Ploi and checking the logs via the dropdown. If jobs are being processed in the logs, it will look something like this:
  2025-05-28 20:45:06 App\Jobs\ProcessImage ...................... RUNNING
  2025-05-28 20:45:05 App\Jobs\ProcessImage ...................... RUNNING
  2025-05-28 20:44:59 App\Jobs\ProcessImage ...................... RUNNING
  2025-05-28 20:44:56 App\Jobs\ProcessImage ...................... RUNNING
Some “gotchas” I didn’t know when I first started this multi-horizon instance journey.
- You need your
APP_NAMEin your worker’s.ENVto match your already-existing Laravel application. Redis uses the APP_NAME as a key, and it won’t pick up jobs otherwise. - The worker’s job logging won’t go to the main instance, but it will be in the
LARAVEL.logof your worker’s application. This is annoying to me personally as I wish it was centralized, but I understand why it happens. - You can configure the worker Daemon with more granularity by using the
php artisan horizon:workcommand instead which accepts various parameters such as queue, falloff etc. Please check the —help parameter to see all the options available. (Thank you to Dennis and the Ploi page for teaching me this!)
If you have any questions please let me know via email, and I’ll try to help!